If you’ve been following me for some time, you’ll know that my blog is about blogging and online business.
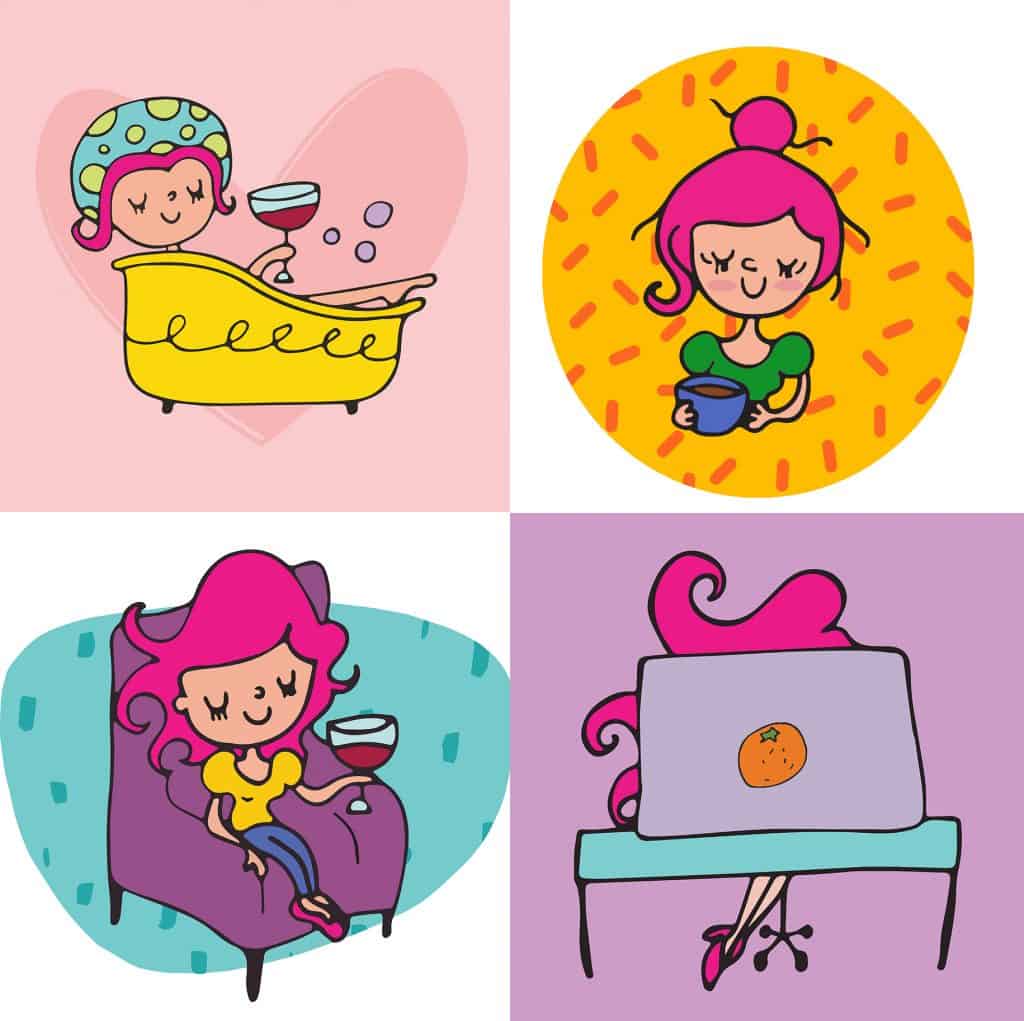
But I’ve made Stray Curls unique by including my own hand-drawn illustrations in just about every single post.
I’ve been asked this question via email and comments several times, so I thought I’d write a very detailed blog post explaining how to become an illustrator and include some really handy tips that will shorten your process on becoming a pro-Illustrator.
You can read the whole story of how I grew up drawing and turned to illustrating here.
Now, drawing is almost second nature to artists because they do it almost every day.
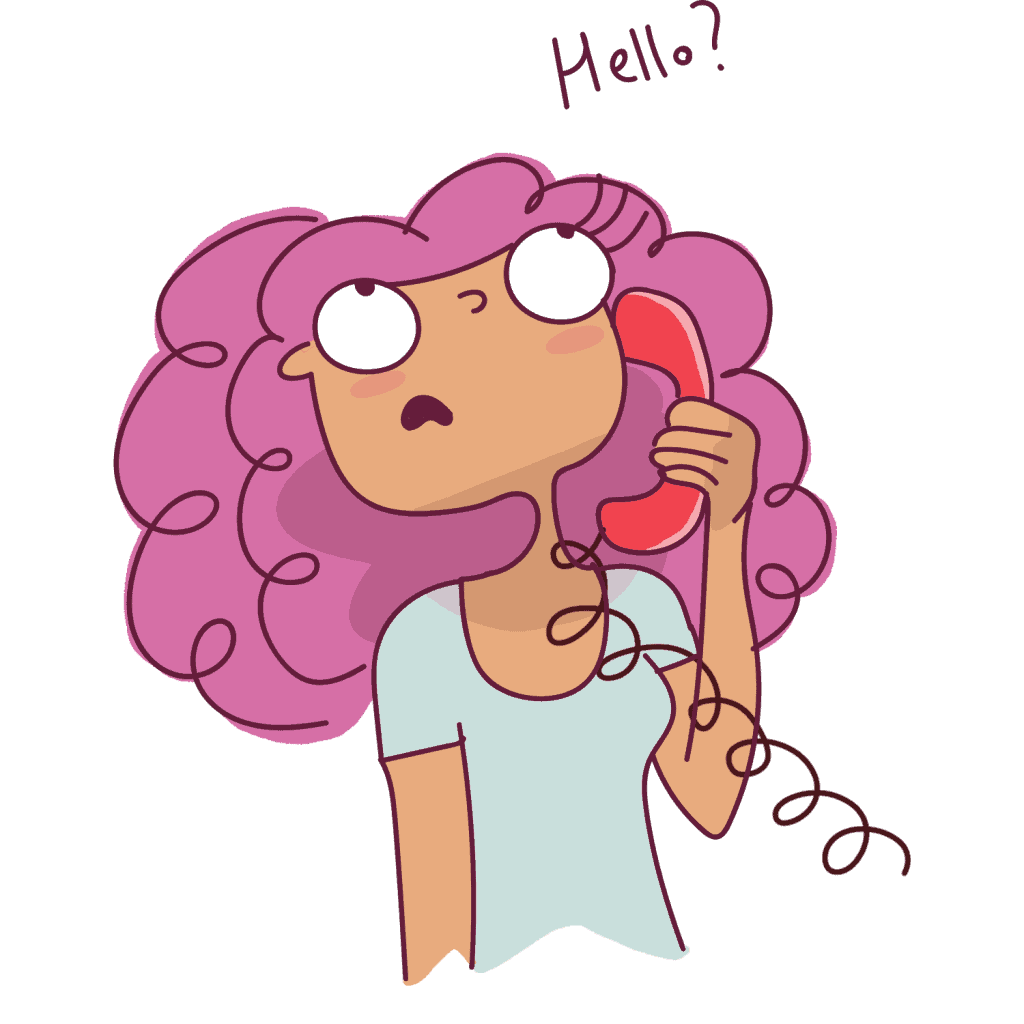
They doodle while talking on the phone, they admire colors or designs if they pass by something beautiful, and they’re fascinated with watching people’s bodies move when they dance because they just want to draw that anatomy.
These are all signs that you’re meant to be an artist.
However, most children who love to draw get their dreams crushed by people around them who say, “You can’t be an artist. It pays peanuts. It’s not a real job.”
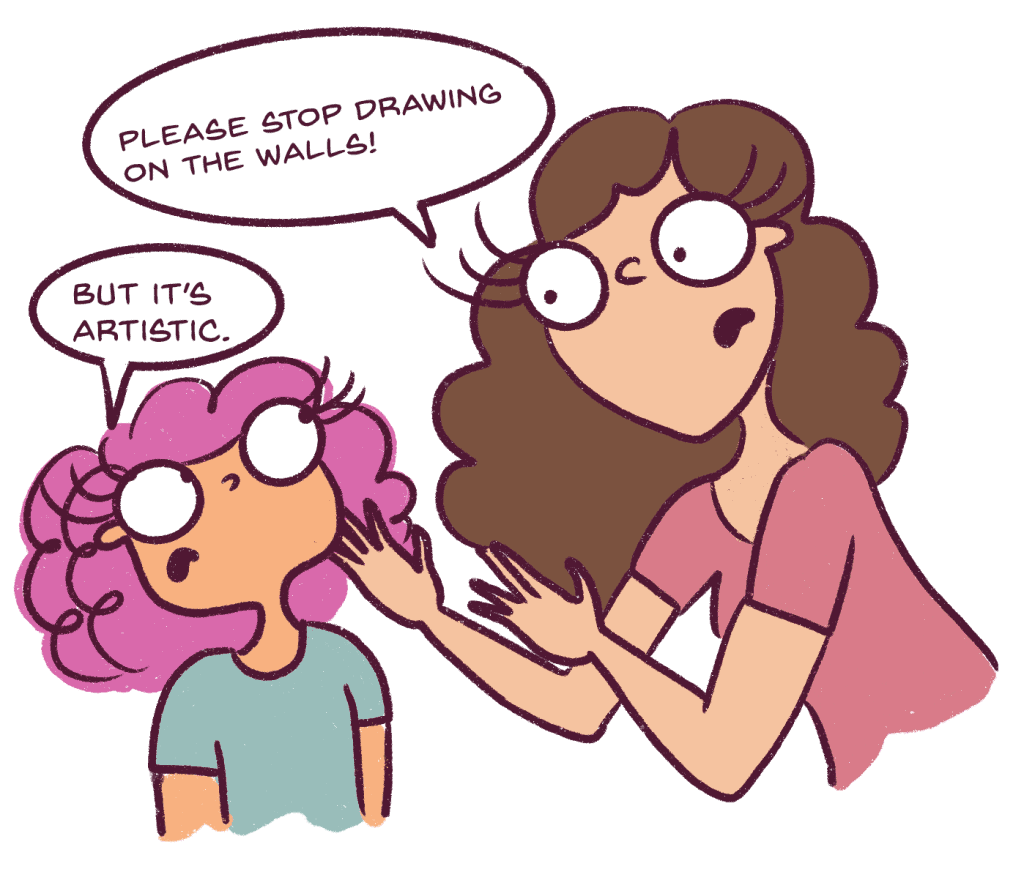
Just kidding, I never drew on the walls… much.
Don’t be disheartened if people tell you there is no future in illustrating.
This advice mostly comes from people who either know nothing about art or have had their own dreams crushed by an elder so they’ve admonished their creativity at a young age and grown up to look for a “serious” job.
Let me go out on a limb here and tell you for a fact that it is possible to become an illustrator who makes a full-time income doing what you love – drawing.
So, if you’re wondering where you begin, what kind of tools can you use to draw and illustrate, and what courses or books you should read, fear not! This post will explain everything.
Ready, Freddy?
Let’s begin.
This post includes affiliate links to products I truly (from the bottom of my heart) recommend, meaning at no extra cost to you, I may earn a small percentage which I will use to pamper my poor pups.
Table of Contents
How to Become an Illustrator without a Degree
Before I discuss the resources and tools I’ve used, I want to talk about the activities I did daily to help me become an Illustrator.
1. Draw every single day
It doesn’t matter whether you want to be a traditional illustrator or a digital illustrator.
You need to get the basics right. You have to draw every single day.
Don’t bother about being perfect. Don’t bother about creating a masterpiece every day. To get to where you want to be, you have to practice.
I didn’t have any illustration style when I first started.
My style was extremely simple. It slowly evolved over the years to become what it is now.
Initially, I’d draw an illustration with a pencil, trace over it with a black pen, scan it into my computer, and trace and color it with Photoshop and Illustrator. It looked very amateurish.
But I’ll explain how I improved.
2. Don’t scrimp out on your learning
When it comes to writing, drawing, or blogging, I prefer investing in myself because it’s a shortcut to getting there faster.
It’s like studying a subject.
You can either try to do it yourself or take a course to get the results faster.
I watched multiple classes on illustration so that I could understand how to draw human bodies, and expressions and capture movement with cartoons.
Here are some classes I loved (all pocket-friendly):
- Draw Appealing Characters with Personality
- Procreate for Beginners
- Digital Character Illustration – Conceptualization and Color
- Pencil Portraits and Commissions
You might think that drawing is easy, but it takes a lot of skills to make illustrations look seamless.
Capturing movement and drawing poses took me some time to learn.
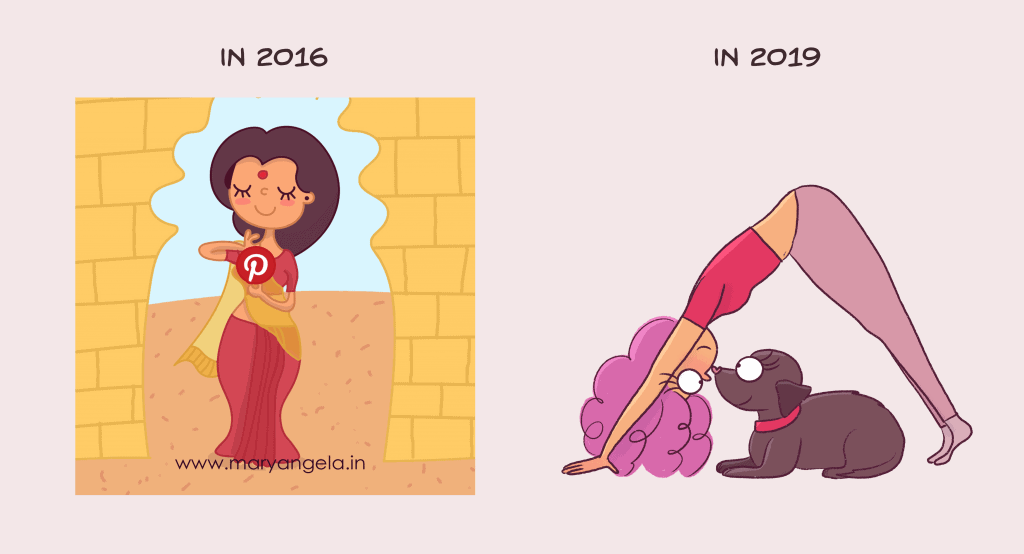
This is my improvement in 3 years.
Illustration tools for beginners
A lot of people ask me what tools I use for illustrating daily.
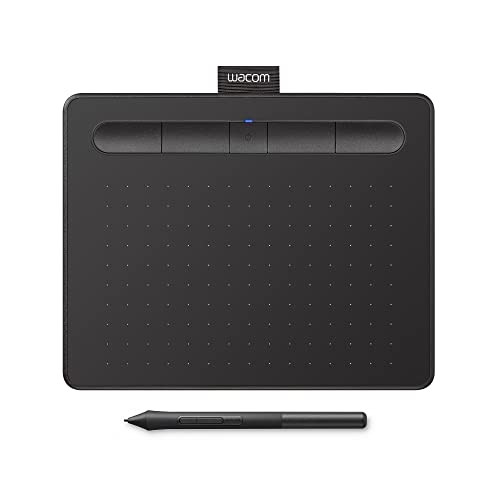
I knew that illustrating was something I was going to do for a long time, so I saved up to buy a Wacom Cintiq while illustrating for clients constantly or doing basic graphic design.

Please note that at this time, I was still working with black ink sketches and Photoshop. I had no graphic tablet. Here are the illustrations I was making for clients:
You can see the lines thickening in some areas due to the clustering of ink in my pens
I understand that a Wacom Cintiq is not an affordable option for most Illustrators who are starting out, so I highly recommend getting a Wacom Intuos if you’re strapped for cash.
You can get it for less than $100.
Once I got this Wacom Cintiq, I used it for 2 years before I upgraded to an iPad Pro and apple pencil.

Why did I switch from using a Wacom Cintiq to an iPad?
- ProCreate on the iPad is much faster and smoother than Photoshop. Especially for my kind of simple digital illustrations
- ProCreate is a small one-time fee for the iPad. You never have to pay for anything again. Whereas with Photoshop and Illustrator, you have to pay monthly – this is a huge recurring expense to bear especially when you’re not earning from illustrating.
- An iPad is portable whereas a Wacom needs to have an ongoing electrical connection 24/7 and be hooked up to your desktop/laptop to work. It can take a lot of space on the table and can’t be carried to a cafe or airport. However, an iPad can be carried and used anywhere – on the plane, in cafes, anywhere. This means I could draw in a cafe just by carrying my iPad. No laptop is required.
- Animations and GIFs become so much easier with ProCreate. I took this lovely class on creating gifs and Illustrations in Procreate to learn how to do this.
- Anybody can draw with ProCreate. As a person who’s been using Photoshop as a teenager, it’s easy for me to navigate around it. But Adobe, in general, is a little slower and more painstaking to understand than ProCreate. I was able to learn ProCreate in 1 day by watching this class on Domestika. Photoshop took me months to understand.

I now use only my iPad to draw all my illustrations because I used to travel a lot (before COVID), and it paid for itself. Additionally, you can save time-lapse videos of your drawings on Procreate which is really cool.
I highly recommend an iPad Pro and apple pencil if you are in love with digital illustrations and want to pursue it as a career or just want to as a hobby.
It’s worth every penny.
What does my illustrating process look like?
When I was using my Wacom Cintiq and Adobe Illustrator/Photoshop, this was my process:
However, I was able to simplify the process immensely using ProCreate and my iPad. Let me break it down.
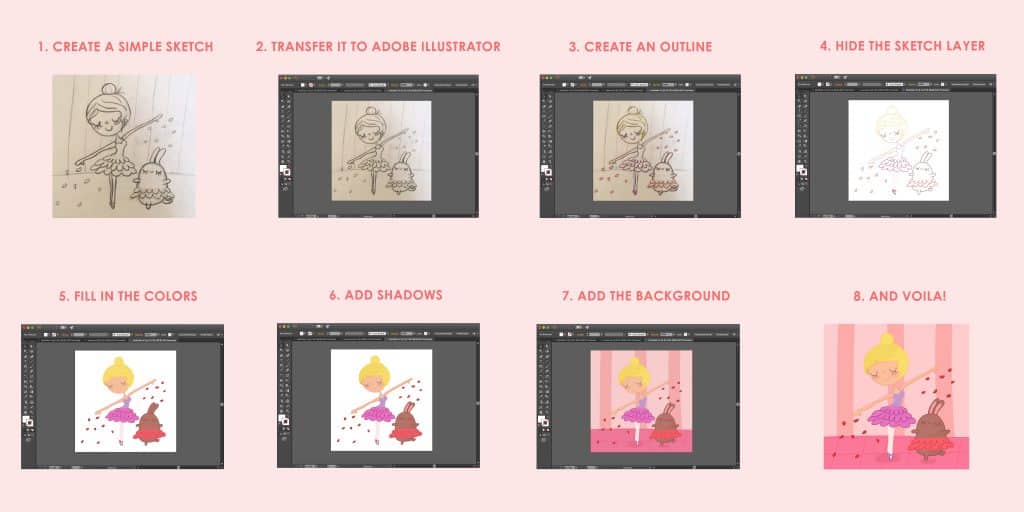
1. I visualize what I want to draw
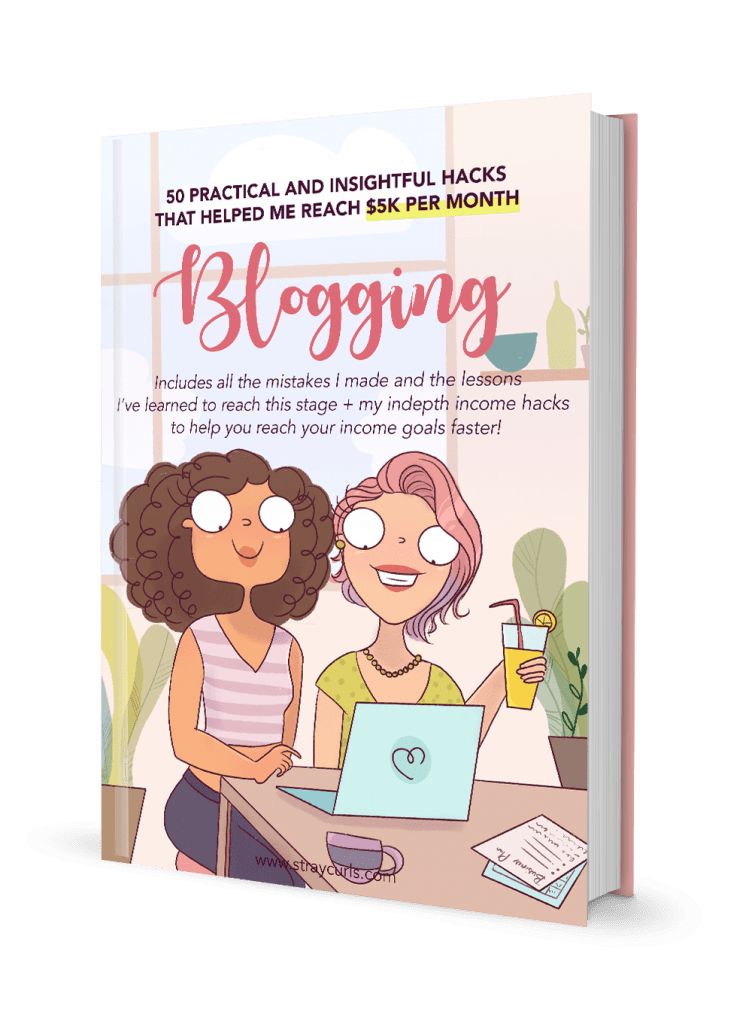
Easier said than done, it’s very hard. When I was drawing the cover for my eBook – 50 Hacks, I first considered what I wanted on the cover.
I knew my eBook was going to be about all the insights I had learned in my 2 years of blogging, so I definitely wanted to convey the fact that I was teaching.
I decided to go with an illustrated version of myself coaching somebody.
2. I draw a rough sketch
Once I know what’s going to be on the cover, I make a rough sketch. This is not perfect and has multiple rough lines. Here’s what the final result looked like:
As you can see, I use an ordinary blank notebook and pencil to make a rough sketch. It’s not neat or perfect and it doesn’t have to be, because I’m going to clean it up while illustrating.
3. I color it with ProCreate
I then outline a new layer on ProCreate using my iPad Pro and apple pencil
After which, I color it using a few colors on my color palette.
The key is to keep the colors subtle and use 2-3 pops of color throughout the image. See the time-lapse video below to understand how I do this:
4. I add the required text in Photoshop/ProCreate
The eBook is not complete until I add the headline.
After doing this, I create a book mockup so that people can see what the eBook looks like before finally putting it up on my blog. For the book mockup, I just used this customizable book mockup file from Creative Market.
How long does it take to become an illustrator?
It will take a lot of time to get to where you want to be, especially if you’re just beginning.
In my case, I didn’t know what I wanted my drawings to look like.
My drawings were too child-like when I began and I had very little understanding of human anatomy since I didn’t go to art school.
It was something I picked up slowly.
It took me nearly 4 years to find my illustration style.
Please understand that you cannot rush this process.
Finding your art style, the color palette you are most comfortable working with and your drawing shortcuts will take time.
It’s like playing the piano. At first, you’re focusing on which key you should hit and with practice, your fingers are 1 with the keys. You don’t think, you just do.
Drawing is sort of like that.
You need to fall in love with the process. It’s more about the journey than the destination.
By drawing every day and focusing on your progress, you will get better and become an amazing artist, I can guarantee you that.
How to find your illustration style?
- Draw expressions once a week: The best way to do this is to practice expressions based on templates you’ll find on Google, or make faces in the mirror and try to replicate what you see.
- Practice drawing hands and feet: This can be very hard in the beginning, but it gets easy with practice. I usually photograph my hand at the angle I want it and then draw it from that. You can also get a mini wooden model like this to help you draw poses and figures.
- Always use a variety of pictures for inspiration: For instance, if I wanted to draw a woman cooking, I’d look at multiple stock photos online to get an understanding of the different poses she could be in before I decide how to draw her.
- Understand color theory: You should never use harsh abrasive colors in your illustrations because nothing would stand out. As an illustrator, colors are very important. You should know the difference between rasters and vectors, CMYK and RGB, and so on. This Domestika color theory class helped me a lot.
- Always start with a rough sketch first: A lot of illustrators can draw directly on the tablet, but I’ve never been able to do that. I just prefer that feeling of pencil on paper before I digitize it.
What are some good Illustration styles?
When I started making comic characters, they were just an idea that I was experimenting with. Eventually, I wanted my figures to have human-like proportions, but still retain those animated large heads, so my style evolved slowly.
Your illustration style will depend primarily on what kind of Illustrator you want to be when you start working for money. If you love drawing characters, consider becoming an Illustrator whose primary job is to create characters.
If you like drawing cars, nature, and scenery, look at companies who are actively seeking Illustrators to make those types of illustrations for their marketing, books, websites, and so on.
If you love drawing illustrations that are very child-like and colorful, consider creating an illustrated children’s book.
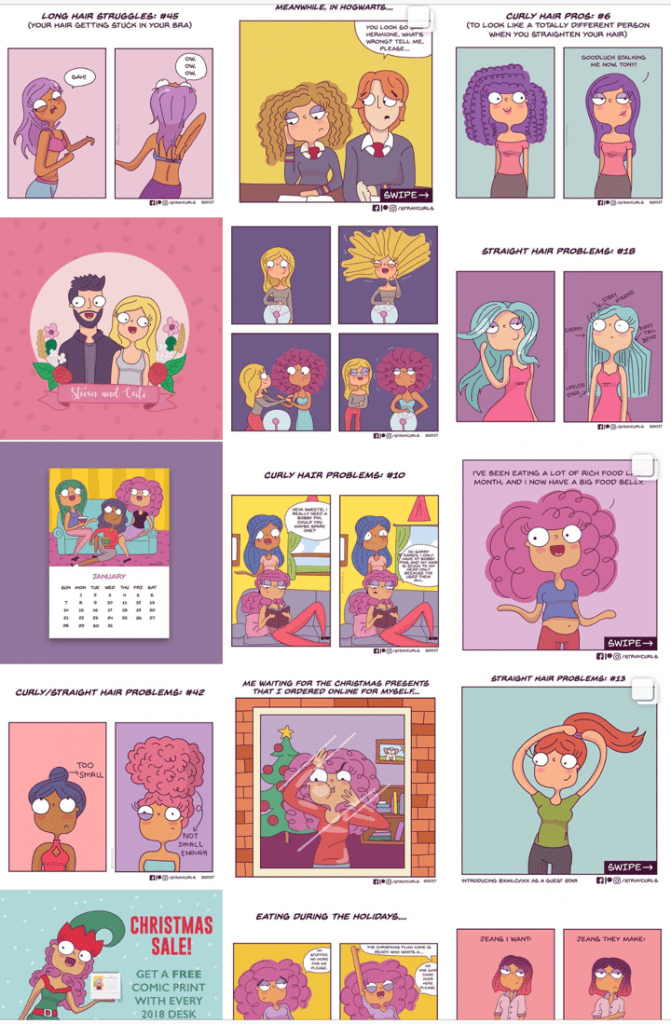
Some of my favorite Illustrators include:
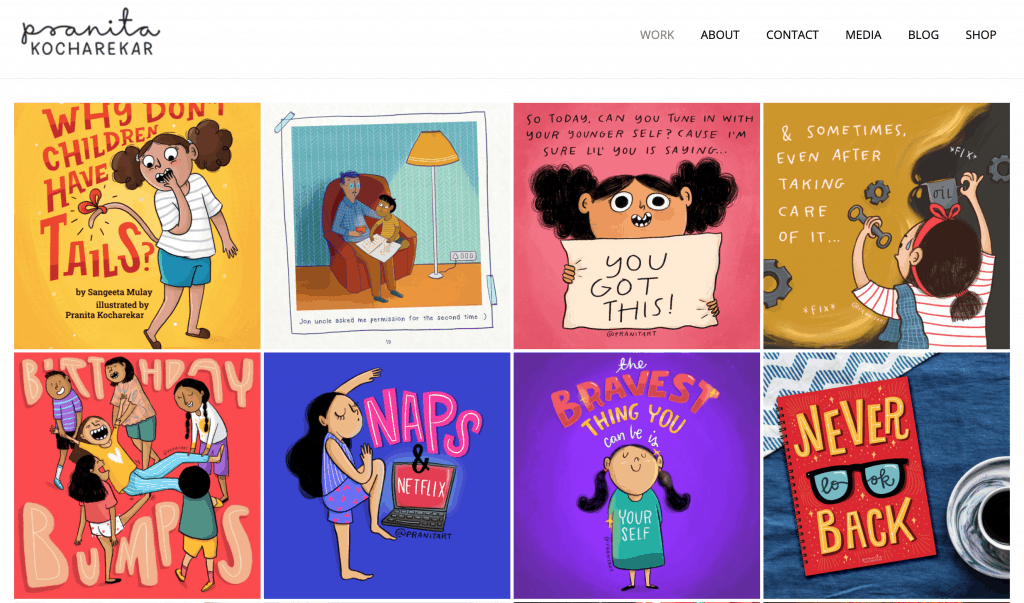
- Pranita Kocharekar
Pranita’s illustrations are colorful and extremely relatable. She covers a lot of issues like mental health, body positivity, and creativity and she has a website where she sells this beautiful merchandise. My fridge is covered with magnets.
- Lucy Knisley
I became a fan of Lucy when I purchased her graphic novel – Kid Gloves. I purchased all of her illustrated graphic novels after that. Her books center around her life – drawing, motherhood, and all the daily struggles most women go through daily.
 I highly recommend picking up her graphic novels, if you want to be inspired or read her stories. They’re worth adding to your library.
 -
Vania Bachur

Vania Bachur’s work is colorful, and cute, and reminds me of every 90s cartoon I’ve watched. I took her class on Domestika on Creating an Illustrated Brand: From Idea to Merchandising and I was hooked. She goes into detail on how you can start drawing, illustrating, and then creating a beautiful brand by printing your work on merchandise and selling it across the globe!
Now, these are just some of my personal favorites. I follow around 500 artists and I just love getting in the minds of other artists and seeing how beautifully they translate their thoughts and emotions into art.
I follow them on Instagram too because they inspire me to create every day.
Make your own list.
Explore, research, and find the illustrators that you love.
It’s good to have a feed that will continuously inspire you to become better and more refined.
Additionally, I found this lovely post by Pedro that teaches some of the different character styles you can adopt.
How to create an illustration portfolio?
I started posting my work on Instagram (that old account no longer exists) and I used it to help improve my art skills.
Posting my illustrations on Instagram came with tons of pros:
- You get wonderful feedback on your work: This helps you grow faster.
- You will be able to interact with a like-minded community: I made friends with tons of illustrators and comic artists and you will never feel alone. If you make the right friends, they will advise you and give you constant feedback.
- You will be able to keep up with current trends: Being on Social Media certainly has its benefits. You’ll know what illustration styles are in trend today, you’ll know about current events and so much more.
- It’s a brilliant way to build your community of raving fans: My first account reached 181K followers organically within 6 months. Because I focus on hair comics alone and it was such an amazing adventure.
It also comes with a lot of cons:
- You will spend a lot of time replying to comments and inquiries: A lot of inquiries will go nowhere and you will get asked the same questions repeatedly. This is why it is crucial to have your website so that you can redirect them there. You can read my step-by-step guide to start your own art blog now.
- You will attract negativity as well: If you’re growing fast, you will attract negative comments and people. It isn’t your job to answer to trolls or take it personally. You will have to develop a thick skin. I have written a post here to deal with trolls.
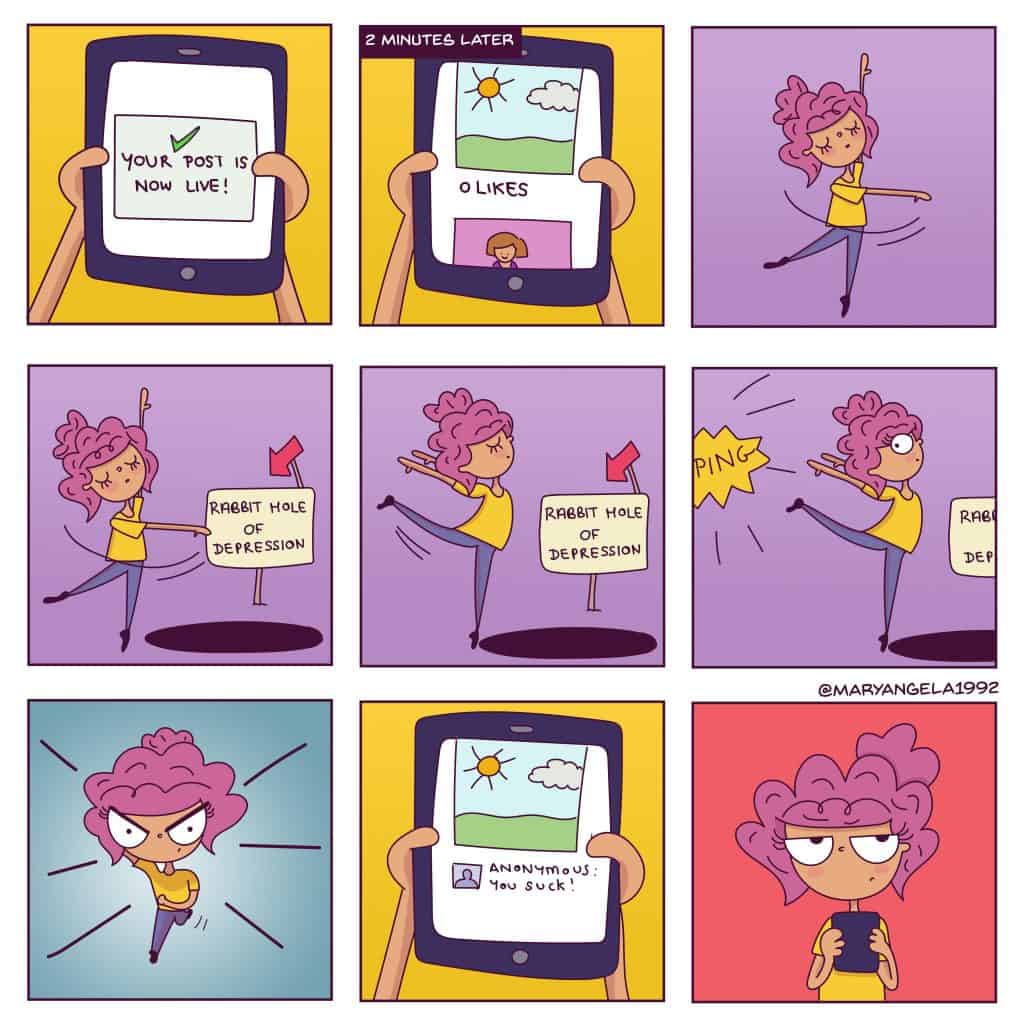
- You may get addicted to social media: It’s very easy to go down that rabbit hole of followers and likes. I’ve been there and it was hard for me to pay attention to anything else. Don’t do this. Remember, that the number of likes you get does not translate to how good your art is.
People love to follow comics because they make them laugh and I targeted a very specific niche of curly hair women, so my followers exploded.
It’s more difficult to attract an audience with just art because you have to move people and at the same time be very consistent.
Please note that it’s really easy to get bogged down by the numbers and go down the comparison hole.
Do not do this.
It will be detrimental to your growth.
It is very, very wrong to compare your beginning to someone else’s middle. Remember that.
Additionally, when you are posting your art on Instagram, Dribble, Deviantart, Behance, etc. you are going to make yourself prone to criticism.
It is natural to get some hate or dislike. It is the internet.
Please know that this is something you will have to deal with as an artist. You cannot go into a corner and feel bad about it every time you get a negative comment.
Out of every 99 people that love your work, 1 will not. Accept it. It’s not the end of the world. Move on.
You may ask, why even have a social media account? Why can’t I just keep my work on the laptop?
Yes, you can. But if you want to grow as an artist, you must get used to people seeing your work. It is the best way to grow. Also, it’s a wonderful way to get feedback and have people appreciate your art.
You will also get clients!
I’ve gotten so many clients via my Instagram account and because I narrowed down my niche to curly hair comics, I’ve gotten the opportunity to work with so many Hair Product companies to make illustrations for them.
What should you note when creating your own illustration website?
Your website not only acts as a Portfolio but also helps others identify what exactly your illustrations can be used for.
1. Understand who your target audience is
When creating your website, make sure you have your ideal target audience in mind.
Mine is specifically women bloggers who want to make their websites look more pretty and interesting by having digital illustrations on their blogs.
So, I get inquiries from women bloggers who either want custom avatars, eBook covers, business cards and so on.
My whole website caters to online business, so people know what my website is about the second they land on it.
Take Betje’s portfolio for instance:
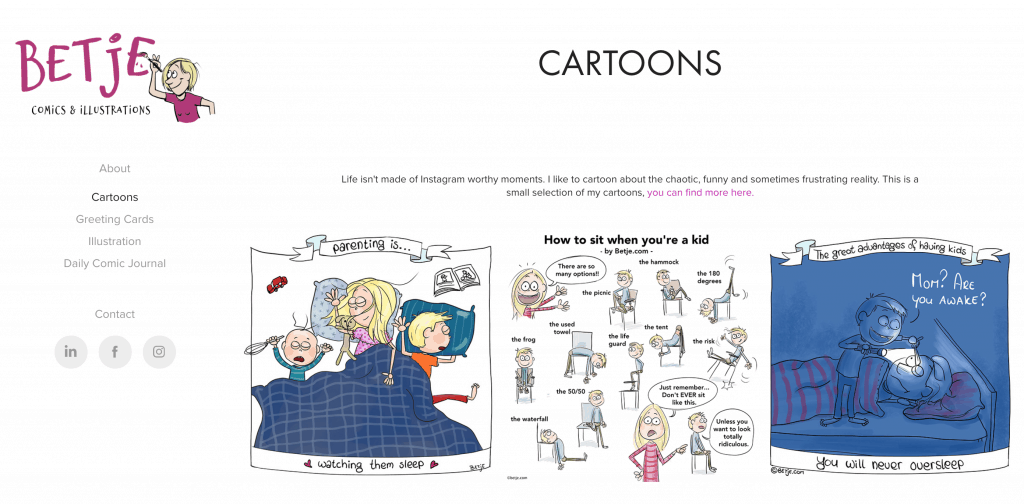
She dabbles with mom and kid humor with her comics and has featured them all over her website. She’s even included a testimonial to showcase her illustrating skills.
2. Make sure your website loads fast
Because our websites have loads of pictures, it can increase the loading speed of the website. People don’t have the patience these days to wait for more than 10 seconds for a website to load.
So, use ShortPixel. It is the best image-compressing plugin in the market.
I purchased their one-time plan for $19.99 and got 30K credits. It compresses all the images on your website (without diminishing quality) so that it loads super fast! I saw the difference in my website speed after bulk compressing.
I have an extremely detailed guide on how you can start your own art blog and website here.
3. Make communication easy
In your Instagram profile, make sure you include the sentence “DM or email me for commissions” in your Bio. Although you may feel like this is common knowledge, people like things spelt out for them.
On your website, link to your Contact Form on every single page or mention your email address so people can send inquiries easily.
Reduce the number of steps it takes to get a client to reach you.
If you are a freelance illustrator, I have a post that will help you gain more clients.
How to become a digital illustrator in the real world?
Once you start developing your illustrating skills and want to make money by being an Illustrator, you will need to brush up on even more skills.
What are the skills that an Illustrator needs to have?
- You will have to market yourself: Just posting on Instagram is not enough. It is crucial that you have a website. You can start a website from scratch in less than 10 minutes by reading this step-by-step guide on starting a blog here.
- You need to know a little bit about online businesses: Read books on marketing, selling, and freelancing. There is a lot to learn and you can’t do it overnight. A lot of these books will apply to several fields like Writing, copywriting, designing, and so on. Take what will apply to you and implement it straight away. Read this if you’re looking for ways to market your online business.
- You will need to learn how to communicate with clients: This means procuring clients, sending back and forth emails or corresponding via Asana, and understanding their requests so that you can translate their thoughts and vision into illustrations.
- Understand where your illustrations will fit into the world: My style is incredibly cartoonish, so I spent a lot of time gaining clients who wanted comics to help people understand what their products were about. See how your illustrations can fit into the world. Can you become a storyboard artist? Or will your illustrations look good in video games? Do your research.
- You have to be willing to learn: No number of finite years can teach you how to become an illustrator. There will always be something new to learn – like a different style or mastering a new tool. It’s a fun journey and it never ends.
- Learn how money works: Because you’re going to be working for yourself, you need to know the basics of earning and saving money for dry months. In the beginning, I lived very frugally. Other than food, rent and utilities, I only spent my money on courses or books that would help me advance my illustrating skills and career.
In short, you’re not just an Illustrator. You’re going to be a Marketer, a Designer, an accountant, and so many other things.

Resources I highly recommend that will help you to become a better Illustrator:
1. How to become a digital illustrator
What I loved about this eBook:
- She covers the different types of skills you will require to become an Illustrator. It really helps put things in perspective. She talks about the kind of attitude you must have and there is a nice audit test you can take to evaluate where you stand as an Illustrator
- She covers the Professional world as an Artist: This is extremely useful if you haven’t gone to university or art school. Because this is information you cannot get with practice.
- She also covers promotional strategies, self-promotion, and tips on how to secure work and clients.
- She has included extremely insightful information on copyright, contracts, and all things legal that Illustrators need to be aware of. Again, this is very valuable information you cannot pick up elsewhere.
- She then ends the book with a chapter on running your own business and managing your own finances.
All in all, as a person who did not go to Art school, I needed this. And it helped me when I had no clue what to do as an Illustrator. I highly recommend that you purchase this book if you’re serious about getting into illustrating.
2. Domestika
Online classes are so much better than attending school in 2020. And I took all the illustration courses from my favorite Illustrators and learned so much.
Whether you want to master coloring, or create better outlines, or draw better, Domestika is such a cheap option. You can buy any Course you set your heart on.
Domestika has helped me make such good progress as an artist and I’m hooked on their illustration classes. Enter the code STRAYCURLS-10 during checkout to get an additional 10% off on anything you buy!
3. My Creative Bundle for Creators
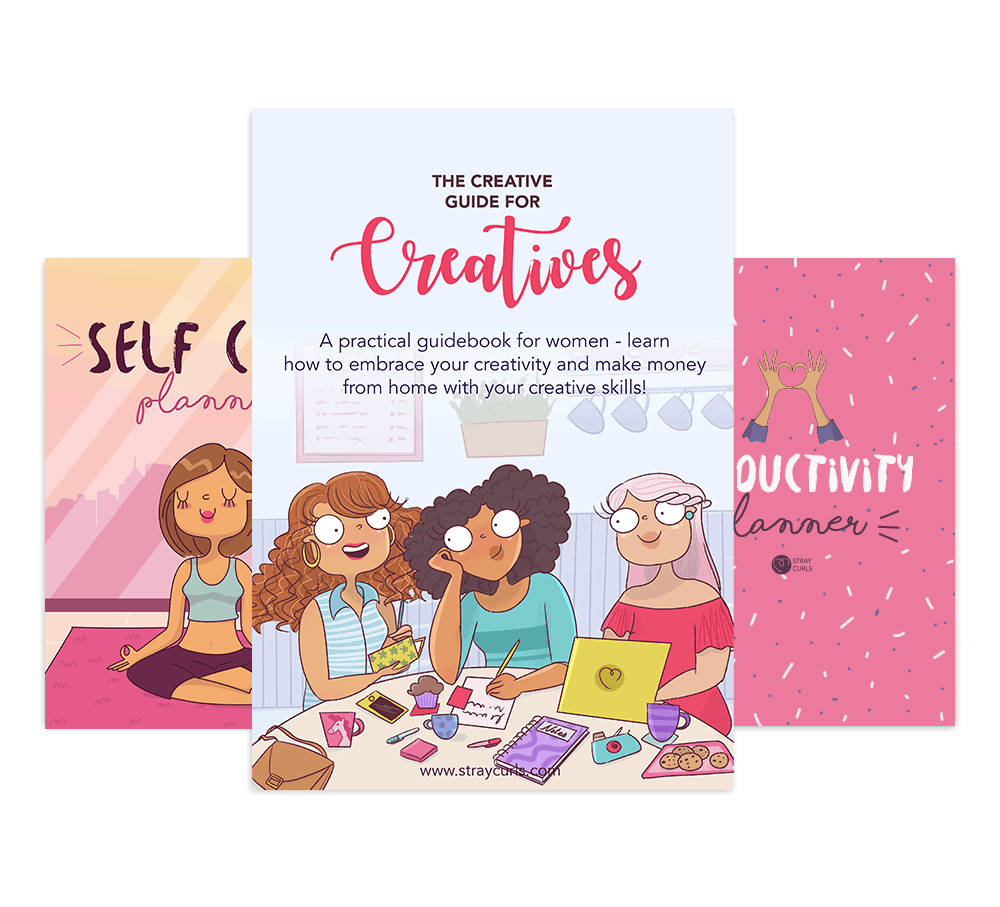
My Creativity Bundle has helped Creators from all over the world become better creators and just create. It’s the answer to your creative blocks and best-seller in my creative section.
The Creative Guide for Creatives includes:
- Tips to harness negative energy to constantly create. Also includes hacks to self-introspect and get past creative blocks.
- Detailed sections and exercises to get past the fear of imperfection, imposter syndrome, the fear of rejection and more!
- Specific hacks to set smart goals, break them into actionable mini-goals, and stick to them till you’re done creating your project.
- The essentials of a business including making money online and gaining clients. It includes a fun Business Plan template that you can use to get started as an Entrepreneur.
You can see the Creative Bundle here for $29 or just get the Creative Guide by itself for $17.
Final thoughts on becoming an illustrator
There is no correct way to be an illustrator. We all have only 1 thing in common – drawing. You have to practice every day. It’s okay to experience creative blocks. I have a post that’s dedicated to overcoming creating blocks here.
But I highly recommend that you focus on the journey and not the destination. It’s not a get-rich-quick scheme. It’s about making a living doing what you love.
Don’t be hard on yourself for not having a drawing style you like.
Some find it almost immediately, and for some, it can take a while.
I know this post might be a bit overwhelming, but please note that I’ve been doing this for 5 years. And this has been my journey.
If you have any questions about becoming an illustrator, I’m more than happy to help.
Please leave a comment below with your question and I’ll get back to you immediately!
Here are some more posts related to illustrating and drawing that you may enjoy:
- 23 surprising ways to overcome creative blocks
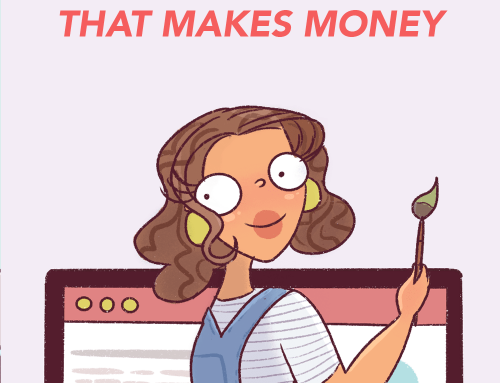
- How to start an Art Blog from scratch that makes money!
- What is Digital Art? How do you get started with digital art?


Omg…!!! Angela what a detailed post and I was aww stuck.. thank a lot angela.. even I’m also one among those who asked (through email) for illustrations post… and im very gratitude for you.. because you giving more priority for your followers… you post on illustration is superb and simply very helpful… I prefer nature illustrations.. is nature illustrations is possible and can get recognize??
Hey Bushra,
You can do any kind of illustrations. :) There are illustrators I know who draw cars, countries, maps, pets and so much more. Draw something you love. I’ve always been interested in drawing people, so that’s something I enjoy doing very much.
Wishing you all the best and thank you!
Angela
I cant believe this post is already here! I was so inspired by your work (I’m also a blogger) but I have no interest in drawing but I tried to mimic your characters for fun and I decided to watch youtube videos and take few classes on illustration. Thank you so much.
Sending love xo
Hello Amira,
Thank you so much! :) I’m so happy you’ve started with illustrating. Isn’t it such a lovely experience? I honestly enjoy drawing so much. And although it takes me so much time to learn, it’s really soothing.
Hugs,
Angela
ANGELA!
Thank you SO much for this post!
I already had so much respect and love for you as a blogger and I, of course, had fallen in love with the cartoons on the blog here long ago! But this post threw so much light on your Art and the BTS of those adorable, ADORABLE comics that you create!
It really gave me the inspiration to pick Adobe back (and yes, *major* learning curve! But I believe I’ll soon get the hang of it… hopefully)
I’m really struggling in making sketching a regular habit these days, perhaps since I’ve always had a love-hate relationship with art itself. I love to put my heart and soul in each piece, and it’s really such a soul-feeding process (no cap it’s pure magic,) But the toughest thing for me is when it doesn’t turn out the way I envisioned it. Then I cry! I cry so much in frustration. The cycle becomes disheartening and ends up in me giving up. And ol’ perfectionism! I’m absolutely not proud to admit that I have *very* unhealthy amounts of it.
But yes, as with every hobby/skill/knowledge, consistent practice will sharpen my drawing skills over time *furiously crosses fingers*
I hope I get around to work on some habit-forming practises I’d been experimenting with, in the coming year. And drawing soon becomes a part of my daily routine (yay!)
I hope your year ends on a beautiful note! I can’t wait to see what you have in store for us in the new year!
Much love and gratitude <3,
Tejas
P.S. If you find it worth your time, I would really appreciate a post on dealing with perfectionism as a blogger. Although you've touched on this several times in multiple ways, a comprehensive post would be an absolute treat!
That, I feel, is something I (who's not yet even launched her blog lol), and many women (bloggers) out there face, and could use some help from someone who's been here for a while (and thriving wonderfully) in the blogosphere.
Hey Tejas,
Adobe is hard to learn, but it’s not impossible. Once you pick it up, it becomes super easy.
It happens. While I was growing up, I had several phases where I would not draw for months. I stopped drawing in between for a year, I’d pick up after and give up again after a few months and so on.
But once you start making an income from it, you become more consistent because it becomes your bread and butter.
And it never becomes as you envisioned it. It’s always different. It can never live up to your expectations. This is the peace you have to make as an artist.
Once it becomes your daily routine, you will enjoy it more. :)
Thank you so much. My year has been wonderful and I hope it is for you too.
I will try to talk about perfectionism as a blogger. You gave me a very good idea to blog about. :)
Lots of love,
Angela
Hi!! I loved how well you have written this post – I understand from the mail you were tensed while writing this one but your posts always make me feel so high and +ve. Am hoping to try some of the resources you have suggested, they sound fabulous!! Thanks again for writing this!!
Hey Akhila,
I was super tensed and I worked really hard on this post. I wanted it to be the ultimate resource for anyone who wants to learn illustrating. :) I’m glad that you loved it! :D And please let me know if you have any questions. More than happy to help!
Can’t say it enough, Angela you are the best! Thank you for this pure gold content :D !
You’re most welcome Jessica! :)
Hi Angela, thank you so much for this post. I loved your article. I want to learn to draw characters, environments, art for video games and animated movies. I also logo Manga art( Anime). Please tell me can I achieve this.? I don’t have art degree or artistic education. I want to learn all of this but I suck at drawing. Please tell me what to do. I am 26 yrs old.
Thanks
Hello Omkar,
Just practice every single day. You can do it all. But pick 1 topic and practise. You don’t need an art degree or artistic education. I don’t have one either.
It’s a matter of perspective. If you “suck at drawing”, it’s because you’re just beginning. Just start practising. Everyday for at least 1-2 hours. It will make a world of a difference.
Do you believe this applies to people who aren’t already drawing or have apparent artistic talent? Any additional encouragement for people who feel more like they are starting from scratch?
Hey Amy,
There is no such thing as talent. Every skill is learned via practice. Some people pick up skills a little easier no doubt, but it doesn’t mean that you can’t become an Artist of any kind. Everyone has to start from scratch. This post mainly reveals how a person can become a digital illustrator. :) Start somewhere and work your way to the top.
Please let me know if you have any questions, I’ll be more than happy to help!
Angela
I am loving your site. I’ve been an illustrator for almost 10 years but it’s a side hustle for me because I have to work a full time job to take care of my family. I’m 40 but I know that I want to be a full time cartoonist. My issue is I want to have fun cartoons but I get caught up in the details and it’s hard to just relax. I don’t like realistic and real life art but I do love cartoons. My fear is not being creative or coming up with ideas. I know it takes time and practice. Everyday practice. I appreciate you and your willingness to share your knowledge.
I’d love to connect with you on social. I’m not wanting to start a blog but I am redoing my website so all the tidbits of info would definitely help. And I’d love to hear what you think of my work. All the very best.
Oh, I love, love, love your work. Super cute! I think you should add more illustrations to your work so people can see the different types of food art you do and so on.
You already have your answer – perfectionism can really stunt our growth as artists. So focus on just improving your skills and post on Instagram too because that will help you get clients. Really narrow down on your target audience, that should really help! :) You can always email me at m@straycurls.com if you have more questions and I’d be super happy to help!
Warm regards,
Angela
I really love your blog.Simple, clear, detailed and conversational.Love love love
So happy you’re loving it here. :) I do plan on making another post for illustrators.
What an amazing blog post! Will u be covering the topic of marketing your illustration work to get more clients?
Thnx!
Hey Sea Shell,
I’ve already written a post on gaining clients. You can find it here: https://www.straycurls.com/easy-ways-to-get-clients/
Hope that helps!
Angela
Fantastic Angela! I burned the midnight oil last night, scanning your post archive upon clicking embedded links. Currently at a crossroads in my life. To b paid to create illustrations and art is my dream. Takes a major mindset shift tho. Thnx so much for being brave enough to put yourself out there! You’re blogs r a complete inspiration and motivator. Cant thank you enough!
Hey Sea Shell,
I’m currently writing a post on how artists can make money online. So, do keep a look out for that. I wish you nothing but the best with your future as an artist. I know you’ll do exceedingly well. Don’t give up and keep pursuing your art!
Lots of love,
Angela
I’ve been reading your blog posts for maybe a week now. And I looove your way of doing things. Simple, creative, authentic. I feel inspired every time I finish reading a post. Thaaank you, Angela! I’m a new mother who’s just started to digitally draw. I’ve always wanted to make art as my main source of income, but I have put off this idea for yeeeeeeears. Your blog is my first step to making this dream a reality <3
Hello Dor,
Thank you so much for your lovely comment. :) Congratulations on your new baby!
I wish you nothing but the best and I’m so happy that you’ve decided to draw digitally and take up this adventure.
Warmest regards,
Angela
What is your method of transferring your pencil drawings from paper to the iPad?
On Procreate, I just click on “Take a photo” and I click a photo of the pencil sketch. That’s pretty much it.
I appreciate your hard work and talent in creating amazing art works. And also its a great post to learn from your tips. Thanks for sharing this detailed post.
You’re most welcome Rahul. =)
I just found your blog and can’t thank you enough for this post! I am struggling to find my style but really want to illustrate children’s books in the future. I’m a self-taught artist and have been drawing for 30 years but I still question whether I can really do it without having gone to art school. This was really encouraging, thanks!!!
Hey Tiffany,
That’s wonderful, I’m self-taught too! You don’t need art school, however, I do have an in-depth post on becoming a children’s book illustrator on my drawing blog:
https://drawcartoonstyle.com/how-to-illustrate-a-childrens-book/
Hi Angela,
I’m happy to find out about your blog today. I read all in my working time in the office. I just want to say thanks for everything that you were ready to share with us – the beginners. I just wonder myself whether I can still work full-time and have a part-time job as an illustrator.
Hey Jenny,
It’s totally possible. I did this while I had a full-time career of building websites, I kept practicing on the side. Now I blog and draw full-time and it’s so much fun!
Warm regards,
Angela
I really love your illustrations. Just came across a post on Pinterest, which I rarely visit. Thanks for the blog post with all the good tips.
You’re most welcome, Caroline! Glad you loved the post!
I just discovered you on Pinterest and I’m hooked. Being self taught, there are so many things I need to learn. This article alone made me aware of different illustrating aspects that weren’t anywhere on my radar. Thanks for this article and I can’t wait to see more of your work.
Hey CC,
Thank you so much, you are very kind. Of course, likewise. I don’t illustrate as much as I used to before since blogging is what I do mostly – but I still enjoy the occassional drawing and as long as you enjoy doing it – do more of it!
Warm regards,
Angela
Hey Angela,
That was a very detailed and informative post.
I also have a similar background in that I used to draw in my childhood but it kinda slowed down later.
Iam also a medical postgraduate but I feel like art is my calling.
Before illustration was a steady source of income for you , how did you support yourself for rent , daily expenses etc.
And is it advisable to continue with a medical job on the side while also practicing drawing . Will that set me back or will it be ok
Hey Natasha,
You can have multiple callings. ;)
You can still pursue your medical field and draw at the same time – it’s the passion that matters.
No, it won’t set you back at all. I also recommend watching youtube tutorials and practicing whenever you are free. =)
While I was struggling with illustrating, I built websites for a living. I also heavily budgeted. I took on any client work I got, that included making logos, designing flyers, creating business cards. I did all sort of odd jobs in the computer field just to make ends meet. I also heavily rationed my food and I’d use tons of tips and tricks to make food last longer.
But those days are long gone and I’m honestly happy to say that I’m living a very comfortable life now. :D
Let me know if you have any questions, always happy to help!
Hi Angela.
This blog has been beneficial. I am working on building an illustrated book for children. I know the process is very long. But I want to take the risk. I have been drawing and imagining how I want my character and what I can add to each of the stories. Sometimes I am afraid to copy some ideas from some illustrates already. Like when u get influences so your imagination copies some ideas that are already presented. Any suggestion regarding that?
Nataly
You can do that – copy or draw other ideas but don’t profit off of them – just use them to build your drawing skill. I did that and that’s how I practiced. I kept it all on my photoshop and procreate because that’s how you get better.
And eventually as you keep drawing, your own art still will appear. :D It’s just practicing daily. There’s no shortcut.
Just don’t post it on Instagram or Pinterest, because people are not kind to that.
Warm regards,
Angela
Hi, wt audience types there ? So i can organize or choose wt i will illustrate, thanks for this blog and i will purchase your ebook asap
This really depends – you can actually search this in Google, I catered to audiences that wanted illustrations for their websites and blogs but sometimes, I also work for companies that make children’s books. It all depends really – you need to decide what you like drawing.
Hi Shaymaa,
What website provider do you use for this?
I just use a standard wordpress blog. =)
Hi Angela!!
Thank you so much for this article. I am a young artist who is just starting to pursue illustration, and you have gifted me with so many great pointers and resources. I cannot thank you enough for sharing your advice! This is the best blog post I could have come across so early into my exploration. I can’t wait to read more of what you have to offer :-) Thank you again :,)
Hey Emma,
You’re very welcome – please let me know about your progress or any questions you may have. I’m so happy that I was able to help in any way possible – that makes me so glad. Thank you hon. And wishing you all the best!
Warm regards,
Angela
Hi Angela,
Thank you so much for your blog post. It is really inspiring and very detailed. I am pursuing a career as an illustrator, and this can help me jump-start the process. BTW! When communicating with clients, is your process only through emails and Asana, or do you sometimes have a call? I am quite shy and not confident in my spoken English.
Hey Mariel,
You’re very welcome. I don’t do calls for illustrative work at all! I always use email no matter how big the clients/companies are. Seriously, you have nothing to worry about. I’ve been doing this for years and I’ve never had to take a call regarding illustration/artwork. :D
Warm regards,
Angela
Can I be called an illustrator if I’ve never mastered anatomy and hands? I like to draw stuff but I try to avoid humans because of proportion problems. I critic my work a lot so I’m stuck and not moving forward with my goal of making money with my art, because I think my art is not good enough