Why, hello there!
If you’re new to Stray Curls, here’s a quick introduction:
My name is Angela Vaz; I’m a 31-year-old Illustrator and Blogger living in Bangalore, India, with my partner and 2 glorious girl labradors.

I run multiple websites (a kawaii blog, a personal development & relationships blog, and a hair blog) simultaneously with this one.
Stray Curls is all about building a profitable blog no matter where you live and what skills you possess.
I’ve received a lot of questions regarding how to get more blog traffic.
I will also link to more posts about getting blog traffic below!
Now, Google traffic becomes more unstable with each update in the algorithm.
SEO isn’t like before.
Every single month, it gets harder to rank for keywords and get blog traffic.
Things are changing at lightning speed.
Now that AI is taking over and people are mass-producing tons of content, email has become more critical than ever.
I cannot stress it enough – have an email list.
Tomorrow, if anything happens to your website traffic or your website, you can relocate and email your list telling them you’ve moved.
You can also start a brand new business and then let people know where to find you – it’s one of the most valuable assets you can have as a Blogger – believe me.
If you have a dedicated email list, you can:
- Send them weekly newsletters (this boosts your blog traffic tremendously)
- Market to them in the future (make digital product sales and affiliate marketing sales)
- Build a beautiful audience (if you ever have to relocate your business or build a similar business like a YouTube channel in the same niche)
The benefits are tenfold.
Stray Curls hardly gets 10K pageviews a month.
This website still manages to make $3-5K every single month—only because of my email list. I have around 10K subscribers, and I prune my list every six months.
My email list is precious.
I also started building an email list on the drawing blog.
You can upgrade to paid versions, but it’s a bonus; you don’t need to unless you want more assets or more functions.
I’ll teach you step-by-step how to do this.
Let’s dive in.
But before that, really quick, please join my SEO email course so you get the briefing on SEO today:
This post includes affiliate links to products I truly (from the bottom of my heart) recommend, meaning at no extra cost to you, I may earn a small percentage which I will use to buy my poor dogs some yummy numnums.

How to create a free opt-in in Convertkit
In this post, I will walk you through how to build an email list by connecting an opt-in form to Convertkit. This is what you’ll learn to create by the end of this post:
- How to create a freebie
- How to create a pretty form in Convertkit
- How to connect it to your website
– and I promise you, it will take less than 30 minutes:
Or an hour if you’re not tech-savvy.
None of the tools are paid – everything is free.
1. Think of a freebie you can offer
The general principle is this: You want people to sign up for your blog newsletter.
But if you create a generic form and say, “Sign up for free updates,” nobody will sign up.
Why?
It sounds generic – everybody does this.
Do you honestly sign up for every blog you read?
Of course not.
The freebie must be reeeeeally good to sign up with your email address.
People value their email inboxes – They don’t want spam because it’s annoying and a huge time waste.
So, you will need a freebie.
Here are some freebies ideas you can make and deliver to someone.
- A quick template
- A mini eBook
- A small workbook
- A printable (be careful with this because a lot of people just want free printables and never end up opening the emails you send)
Here are some ideas of digital products you can create and even sell.
You need to make sure that the freebie you give is:
- Very similar to your niche (that way, people downloading your freebie will open your email newsletters because it’s related!)
- Quick, easy-to-consume and neat
- Valuable
Another great idea is to convert one of your best blog posts into a PDF file.
Take some time and make it pretty. Add some nice stock photos to ensure the PDF reads like a small eBook.
It’s your content.
It’s fine!
And now deliver it as a freebie.
This is what I did with Mind Space Cafe.
2. Create the Freebie + Opt-in Image (using Canva Pro)
You can use any software like Picmonkey, Photoshop, or Canva Pro
Please note that you can use free templates if you have a free subscription to Canva, but the options are limited, so I prefer Canva Pro.
When you have the Pro version of Canva, you will get access to more options. But you can use any template.
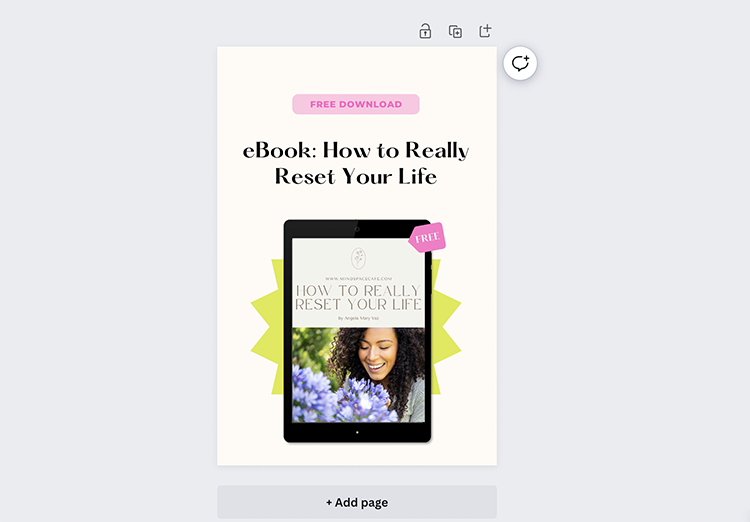
Now, I’ll customize the front cover and copy-paste my in-depth blog post into an ebook template:
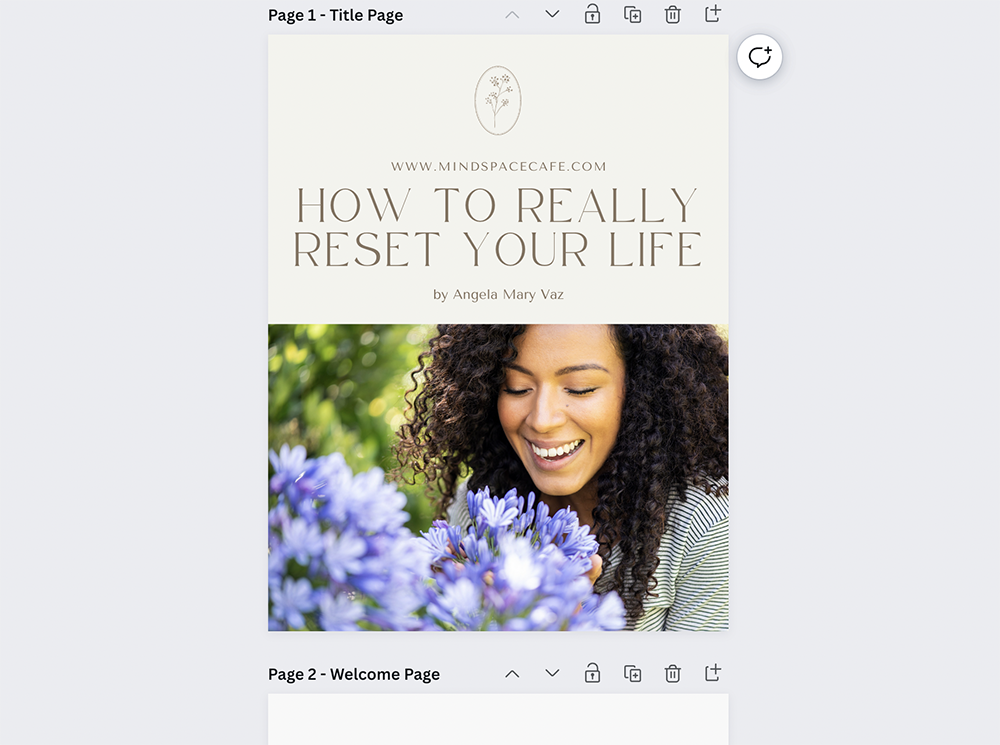
And I’m done!
I’ve created a nice mini-eBook in 15 minutes.
I’m going to download:
- The whole PDF to my computer (this will be the file people get when they sign up)
- The front cover as a PNG file (I’ll need it to show people what they’re getting).
Now, we need to create the form so that people can sign up for my blog!
We will need one more image, so I will search for “download image.”
I like this one!
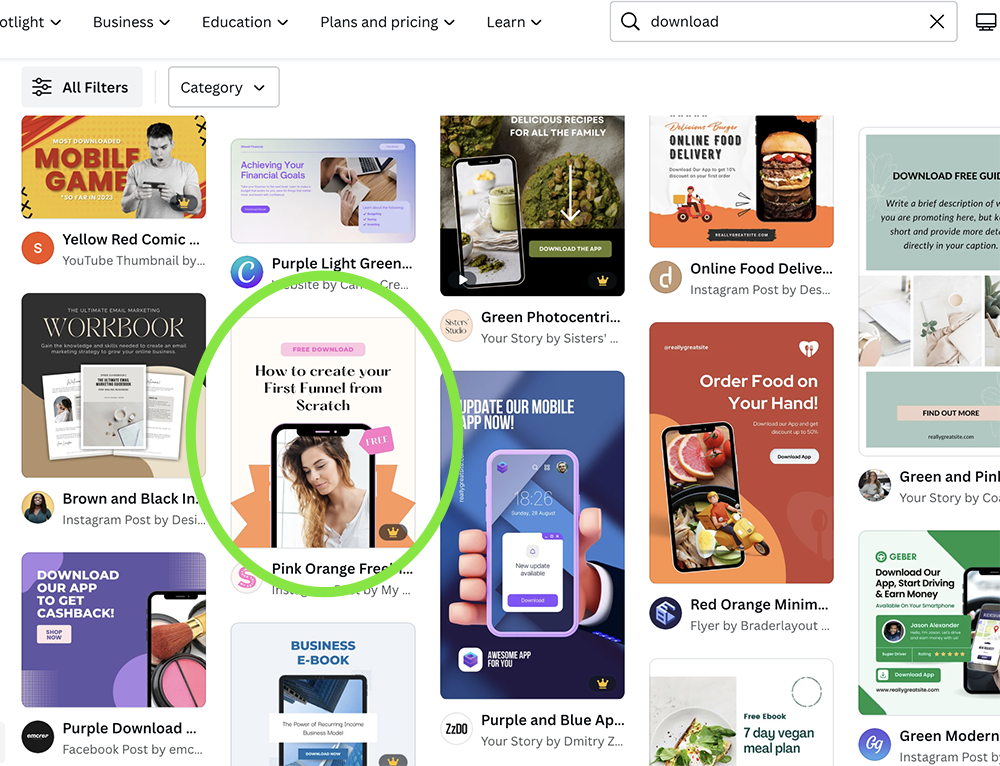
I’ll just customize it and upload the eBook cover I just downloaded.
I’ll also change the text to reflect my freebie, and I’m done!
Voila!
Now, we’ve finished creating the freebie and the freebie opt-in image.
Next, we need to create the form!
3. How to create a form in Convertkit
Sign up for Convertkit for free using this link.
It’s free till you accumulate 1K subscribers – so that will last you a long time.
You can upgrade to the paid version now or use it for a while and then upgrade.
Either way, it’s the only email marketing platform I’ve used since 2018, and I use it for all my blogs.
If you aren’t happy, you can always download your subscribers in a CSV file and upload it to another email marketing software later. For now, I’m showing you how to do this for free.
Now, go to “Grow.”
And click on “Landing Pages and Forms.” Next, click on “Create a form.”

Next, click on “Inline form” and then click on the Charlotte template. I like how clean and straightforward this form is.

Now, customize the text to whatever you want it to be. Click on the image and replace it with the freebie image you’ve just made – you’ll get something like this:

Next, go to “Settings” in the top right-hand corner and edit the “Success message.”
Someone who signs up for this form on your website will see this success message. So, you must assure them that the download is coming to their inbox.

Next, click “Incentive” and upload your PDF file or digital product.
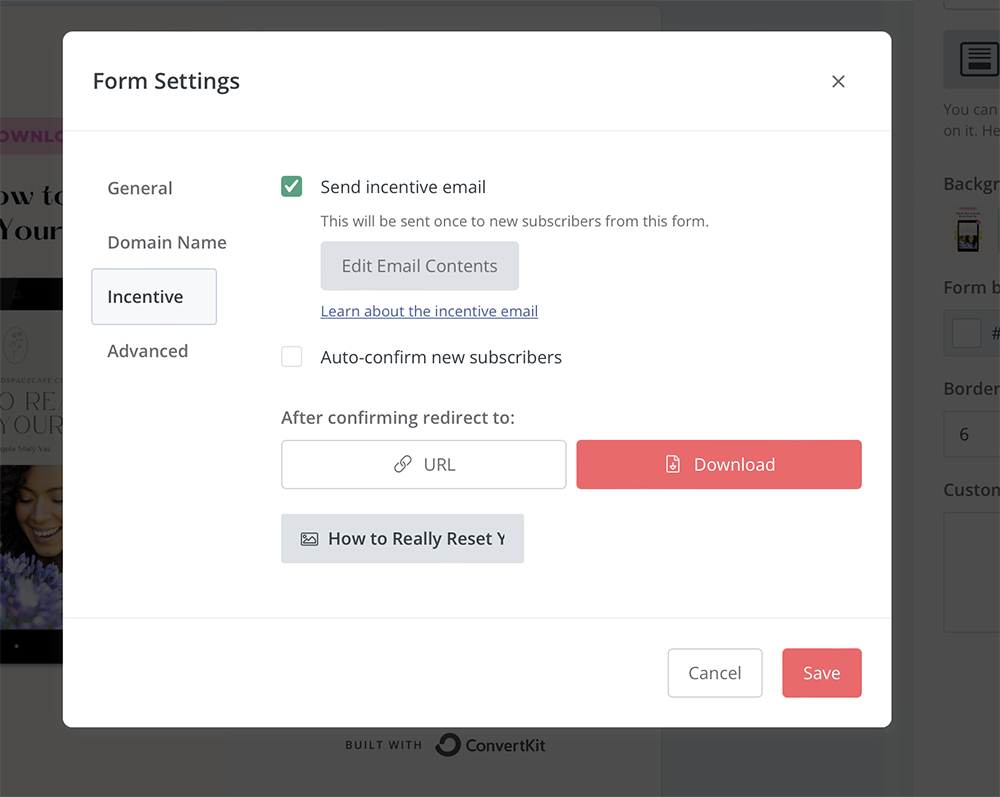
Voila! You’re done!
You’ve successfully created a form in Convertkit and attached your digital product to it.
Now, whenever someone signs up for the form, they’ll receive the download and be added to your email list.
But you have to put the form on your website.
You can copy-paste the shortcode into every page or set it as a default form.
Let me teach you how to do that.
4. Put the form in your blog posts
I want you to go to your WordPress Dashboard and click “Plugins.”
Then, click on “Add new” and search for Convertkit.
This is the one you’ll want to download:
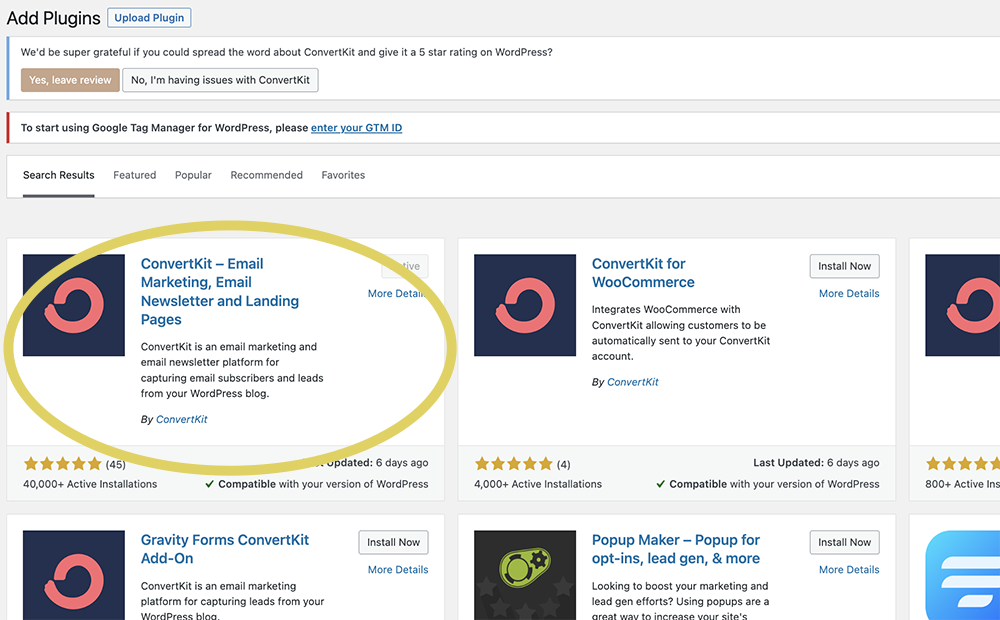
Install and activate it.
Then go to the settings:
Sign in to Convertkit on a separate tab in your browser and find your Convertkit API key and secret key.
Copy and paste it into the Settings here on your Convertkit WordPress Plugin:
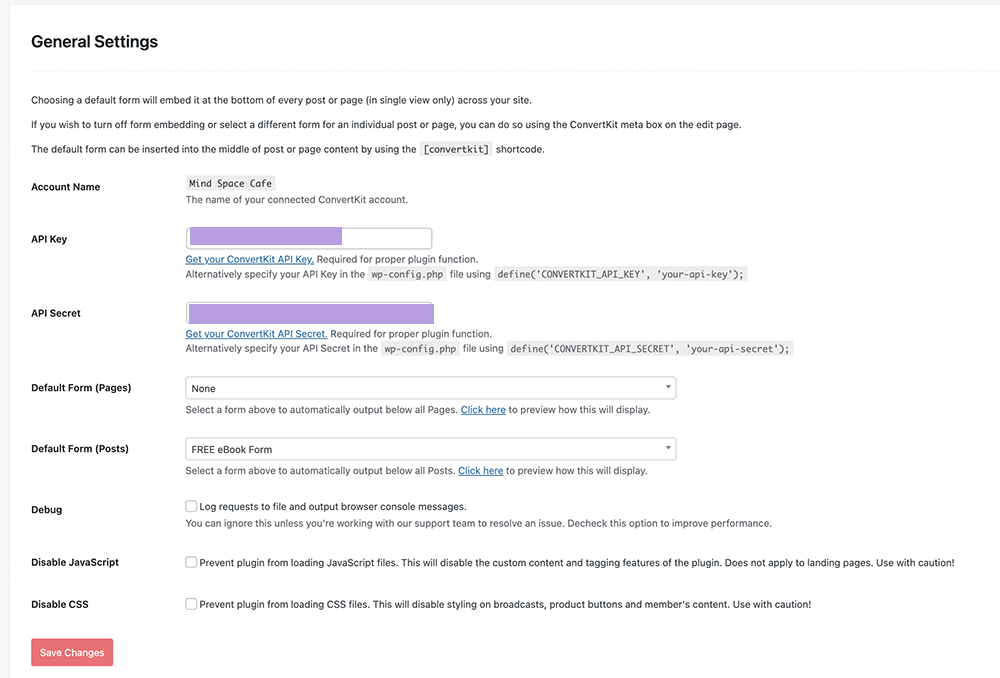
In “Default Form (Posts),” select the form you just created—it will appear in this dropdown.
And now, your form will display on every single post at the bottom!
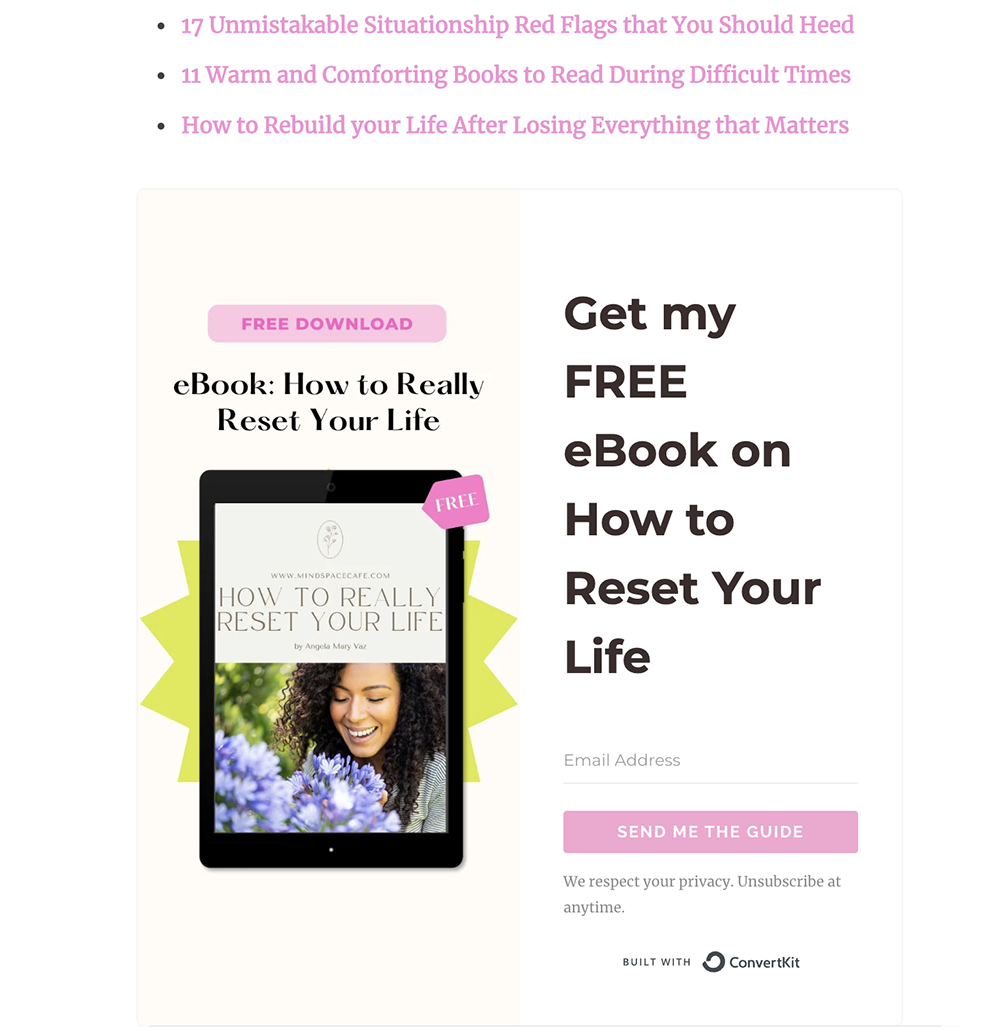
I did this for my drawing website too (I offered a small drawing worksheet), and here’s how it looks:

Isn’t it cute?
You can do all of this for free by getting the free plan of Convertkit.
Now, you’ll get email subscribers every single day for free.
Make sure you email them every week to keep in touch.
If you don’t know what to write, write a small introduction and then link to 3-4 blog posts related to the topic you chose for that week.
That’s it.
Remember to clean your list every 6 months – this will keep the dead weight off!
Conclusion
I hope this post helped you understand how to get email subscribers for free and helped you see how easy it is to start an email list.
If you have any questions or want to say hi, comment below. I will reply as soon as possible.
Don’t forget to sign up for my 7-day free email challenge to learn how to get more blog traffic to your blog!
Here are some more posts you may find helpful:
- 23 clear reasons why your blog is not getting any traffic
- 7 blog traffic hacks to implement right now
- 7 holiday post ideas to skyrocket your holiday traffic
- 33 simple ways to double your blog traffic
- How I write blog posts in half the time
- How long does it really take to make money blogging?
- A step by step guide to start a lifestyle blog?
- How long does it really take to get organic traffic? Explained with example
- How much money I made in my 6th month blogging? (with screenshots)
- What I’ve learned from running 4 blogs
- 20 blogging questions I frequently get asked – Answered!


Hi Angela,
Thanks for this tutorial to add opting forms with convertkit.
I’ve struggled with it in the past and just finally gave up.
But with your help I’ve set it up this morning.
My only problem is that my form isn’t sending emails.
I don’t know what I’m missing.
Thanks again.
Bree.
Your form can’t send emails. You have to send emails each week when you send your newsletter. Or do you mean that the freebie isn’t getting delivered? Do let me know. I’ll try to help.
Hi Angela,
Thanks for your willingness to help.
Apparently, I was using my Gmail as the sender email instead of my domain email.
Also, I was using Cloudways hosting, which doesn’t have free email.
But I’ve switched to a hosting that also has emails.
So the sender email stuff has been fixed.
Hopefully, my form will start working now.
Thanks again for all you do.
Hey Bree,
Ah, that makes sense! I’m glad you were able to work it out. Best of luck, I hope the form works well!
Lots of love,
Angela
Thank You so much Angela for such a useful post. Everything is crisp and crystal clear to follow. So grateful that I found you! Keep Going.
Ah, thank you Pratishtha. I’m glad I have you onboard as a reader – it makes me so happy to hear your feedback and have your continuous support. How is your blog going? You’ve been doing this for a while now and your content is so good!
Lots of love,
Angela
Thank you so much for such kind words. My blog is improving now as I followed your advice and am sticking to one niche now. I have seen some improvement in rankings but I am still on the 3rd page of google for most queries. So the road is still long but I am happy that I am progressing. Thank you so much.
I was missing your new articles, I hope everything is alright at your end.
Hey Pratishtha,
As always, lovely to hear from you. I’m glad things are working for you – yes, niching down has really helped my blogs grow. Aye, I’m more active in my emails – I just don’t have that kind of time for blog posts on Stray Curls anymore. And last month was very heavy in terms of work and travel – so I’m trying to cut back whenever things become too overwhelming for me.
But thank you – you always check in on me, and I really appreciate it. You are a sweet soul.
Warm regards,
Angela
I stumbled upon this post again from your newsletter and it reminded me about my mistakes and things to improve. Love it
Thank you so much love. =) I’m glad I was able to help in some way! So good to hear from you again. I love our little chats.
Warm regards,
Angela
Hi Angela, i have started my blog thanks to you! I’m in the middle of setting up convertkit, and was wondering if i need to have a professional email with @myblog.com? Thanks!
Always, yes. It looks professional. Just check with your hosting – most hosting provides a free email with the hosting plan.
Warm regards,
Angela
Thanks a lot Angela for this amazing guide!
I needed this really bad because I am just getting started with building my own email list.
This post helped me a lot!
You’re most welcome Khushi, I’m so glad you enjoyed the post. Your email list is super important – now, more than ever.
Warm regards,
Angela